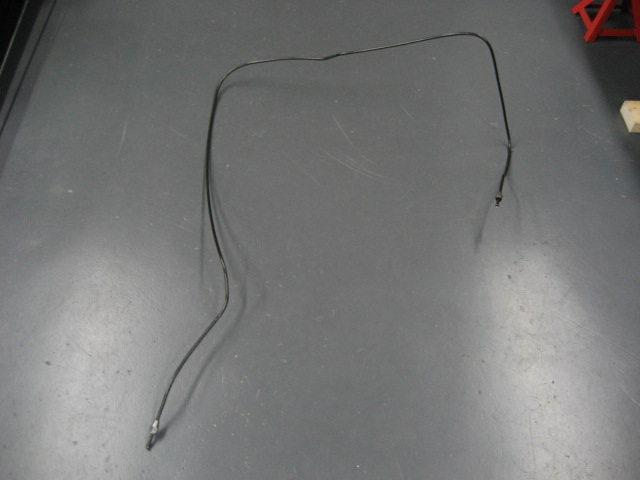
15six_361
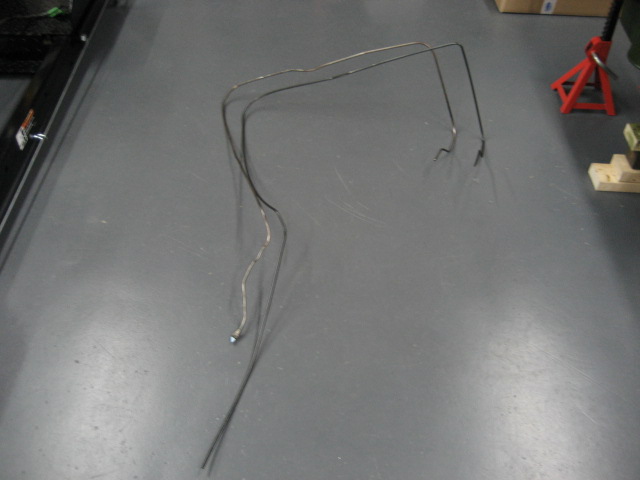
I start with the brake line, made from the steel tube I bought
15six_362
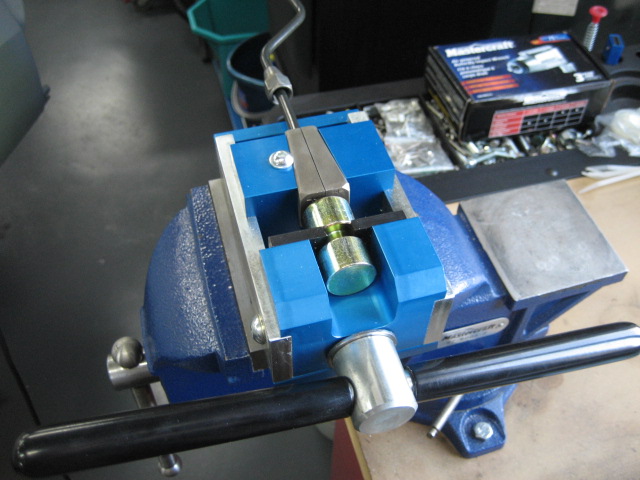
I use for the first time my special tool to shape the flare at each end of the tube, with a common flare shape or the Citroën specific one. Here this is a common flare, made in three steps, the first one is to position the tube correctly
15six_363
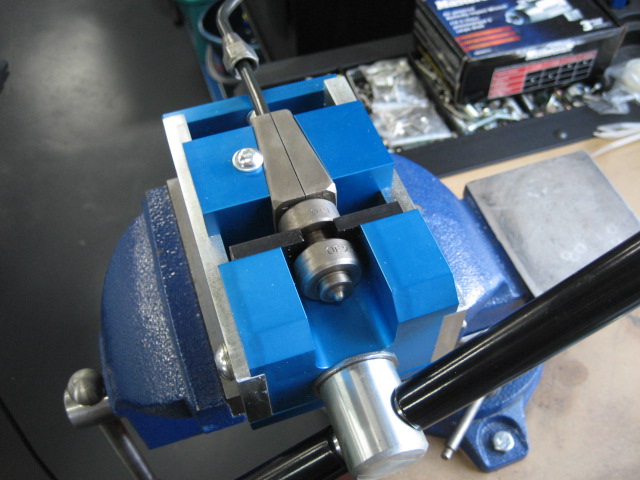
Then I use a die with two different sides, to flare in two steps the end of the tube
15six_364
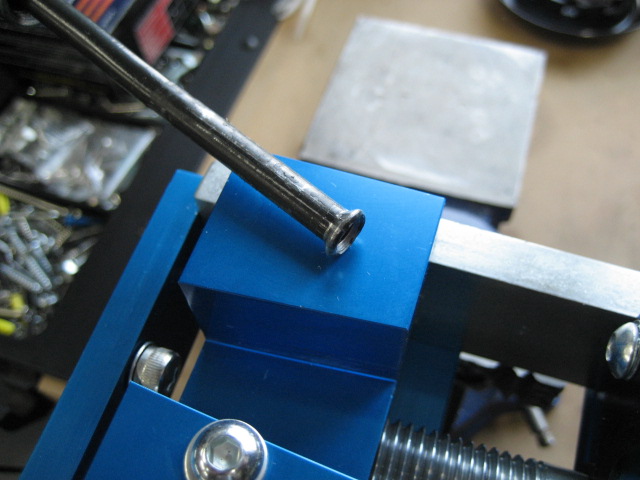
Here is what it looks like. I needed a few tries before getting a good result… so I had to shape another line because my first flare was not good at all. That’s the usual “try and error” process 😉
15six_365
Once the first flare done, I check how the line fits and I do some adjustments
15six_366
15six_367
Then I realize the second flare…
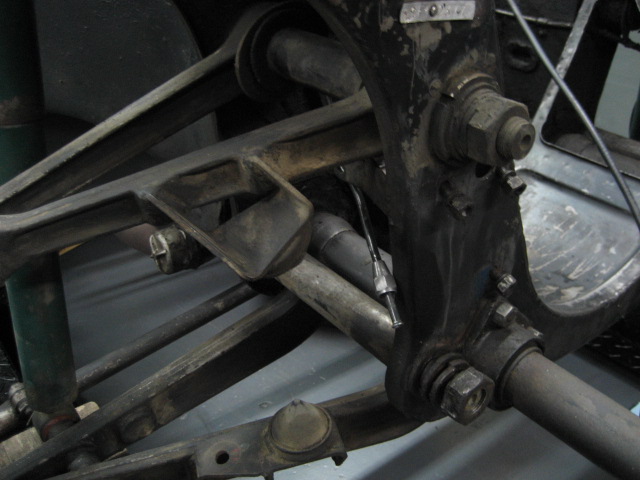
15six_368
… and I install the line. Here at the front the shape is not the final one, I wait for the connection fitting to be back into place
15six_369
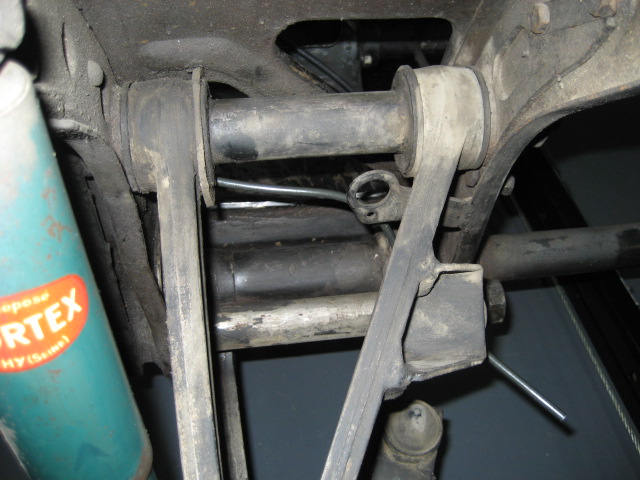
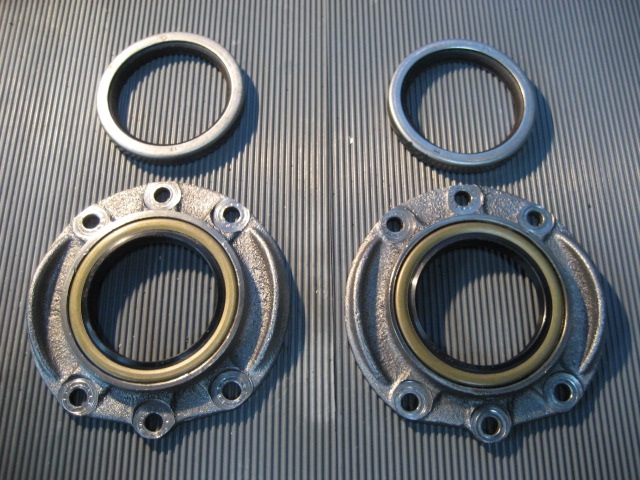
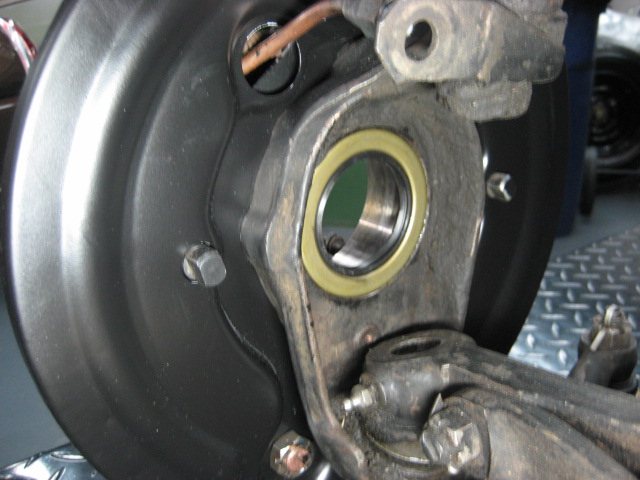
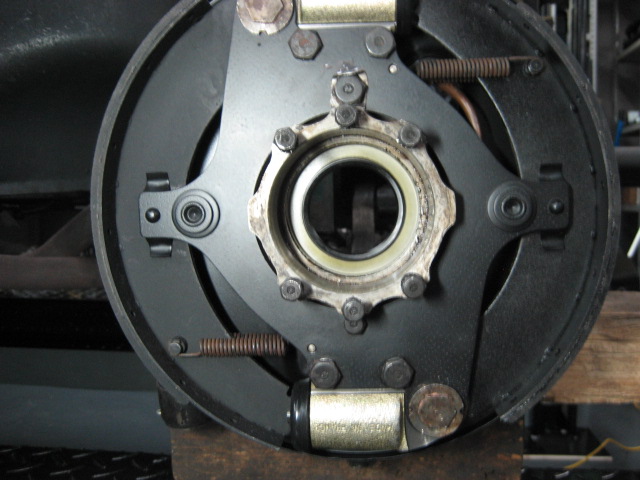
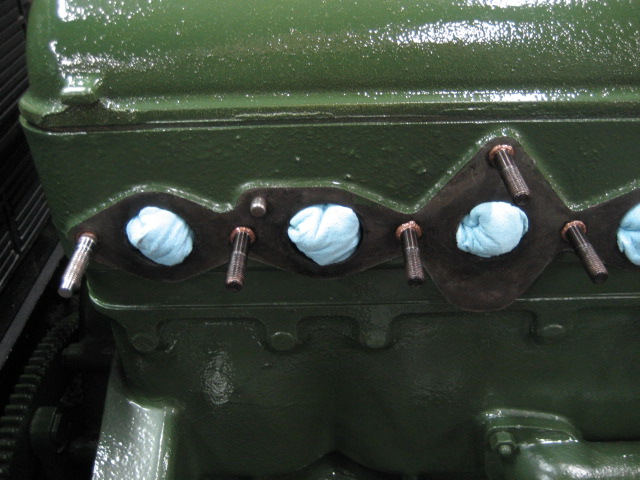
Then it’s time to install the seals for the wheel bearings, in the pivots
15six_370
The installation is quite easy
15six_371

15six_372
Here are the engine mounts with their new paint. I found some green paint on them so I painted them green again, but I think this is not their original color
15six_373
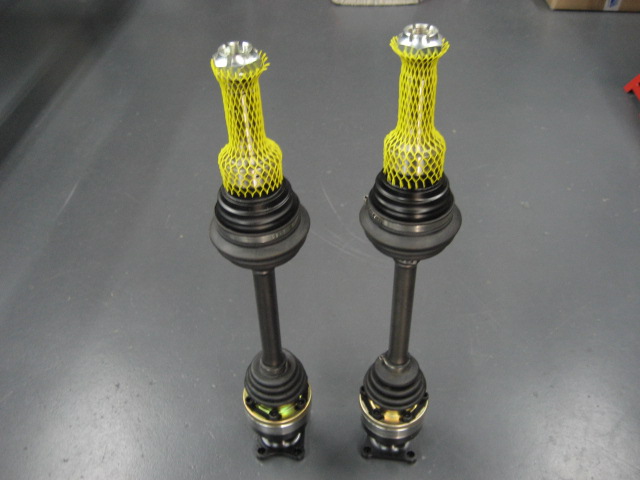
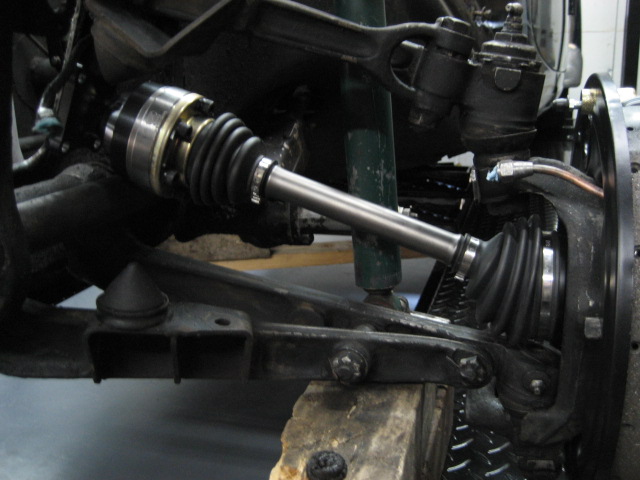
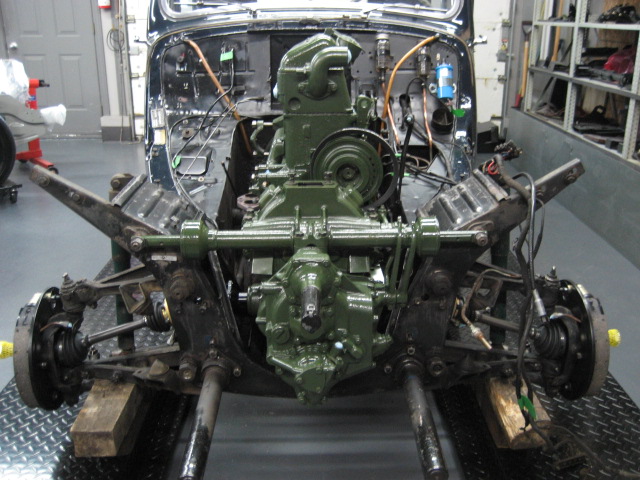
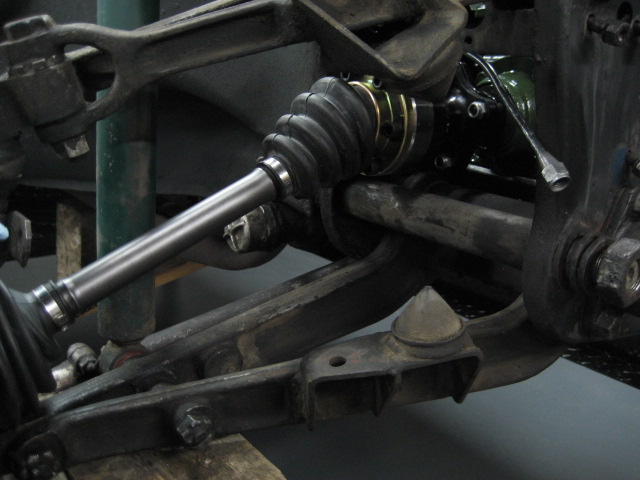
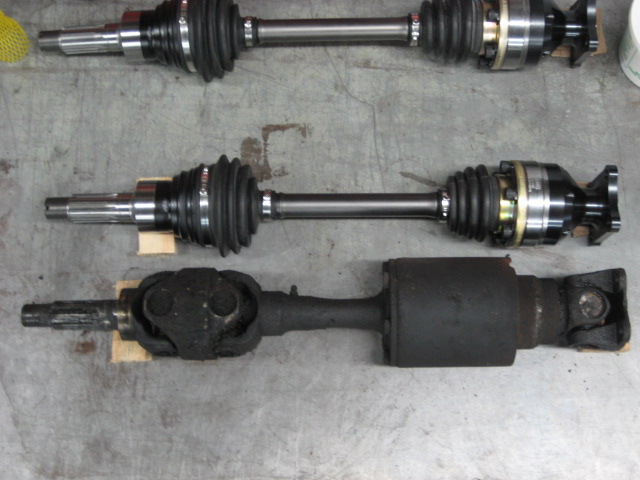
Here are the new transmission axles, they are not identical to the original ones (they don,t have the “bibax” shock absorbers)
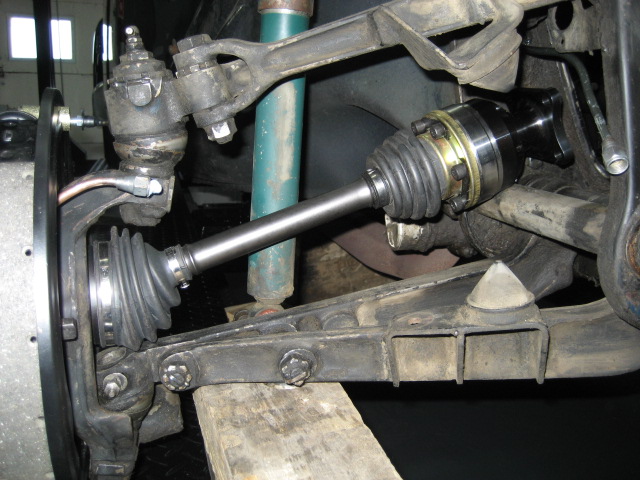
15six_374
It’s better to install them before reinstalling the engine
15six_375
15six_376

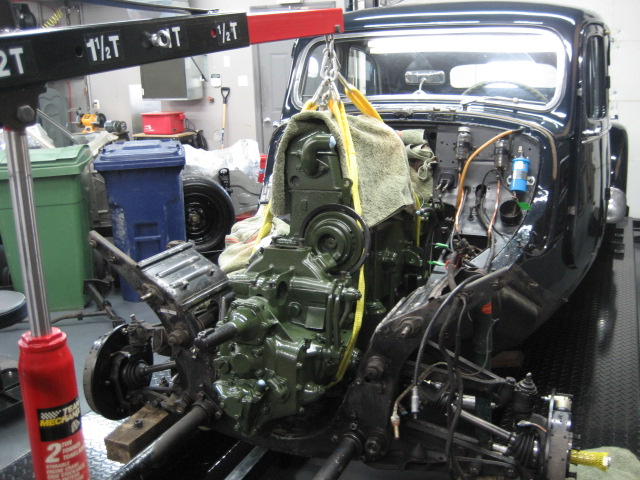
15six_377
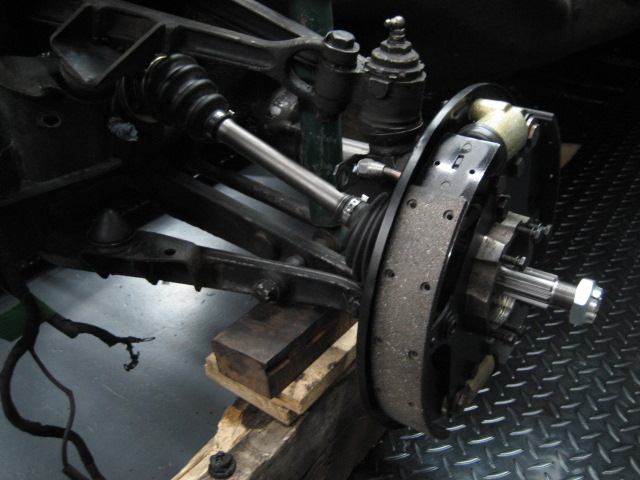
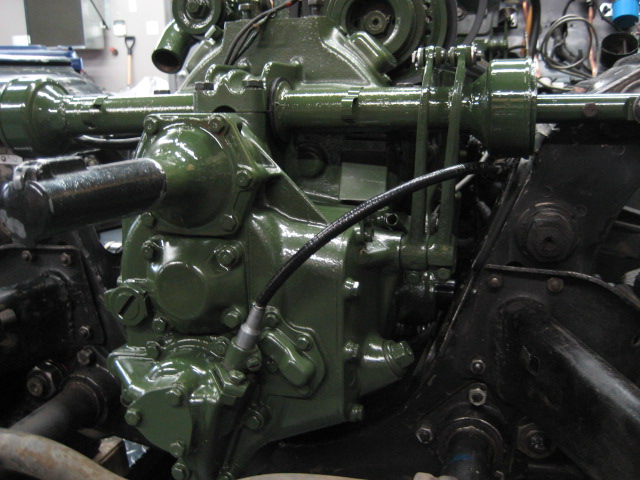
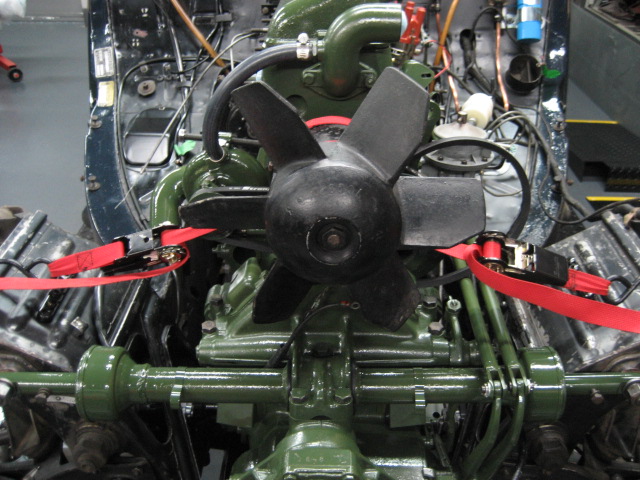
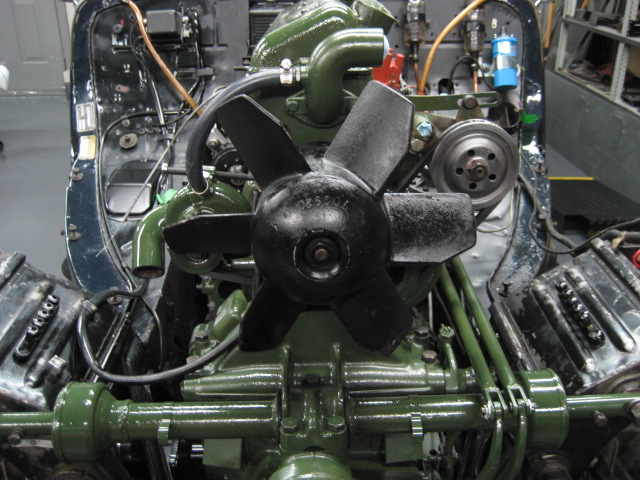
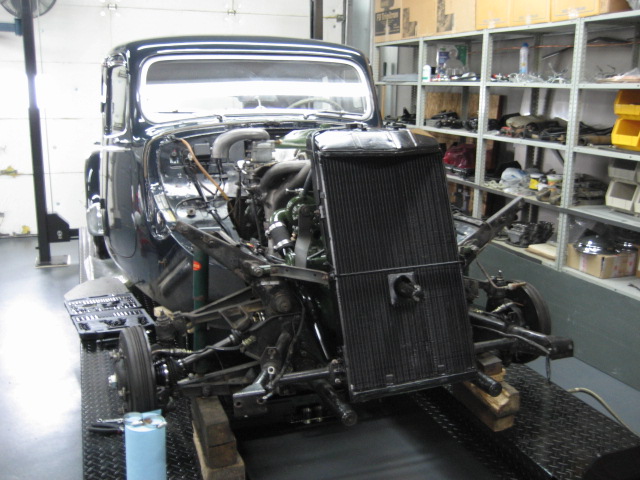
Then comes a big moment, the drivetrain reinstallation. I did that alone and it went very well
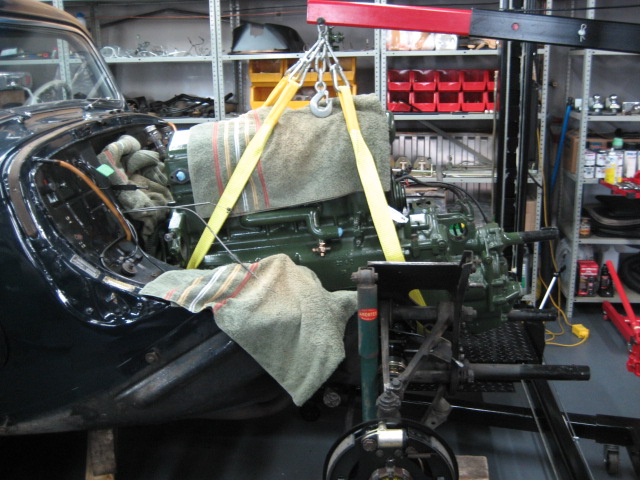
15six_378
I tried to protect the paint, using straps instead of the usual chains
15six_379
I put the drivetrain back without the front mount, I thought i will be easier that way and it was, especially when the transmission plates have to go through the front axle
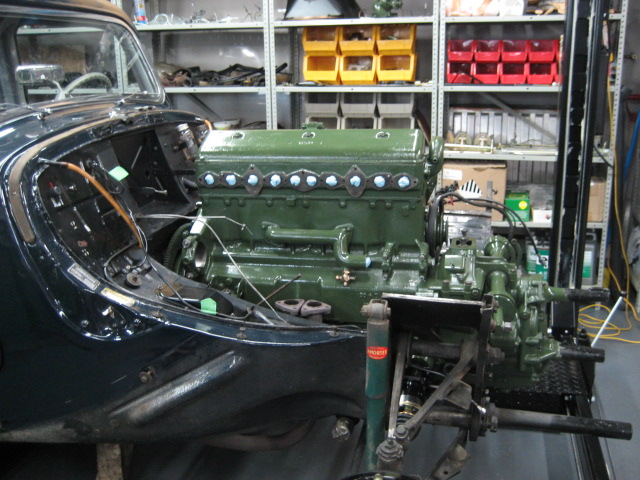
15six_380
I put the front mount back when the drivetrain is in position
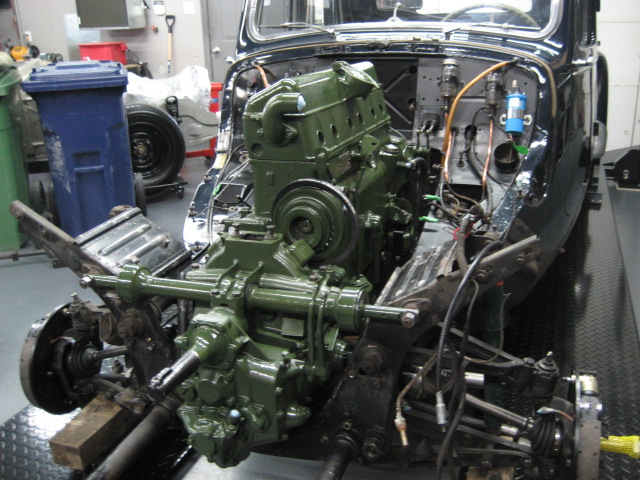
15six_381
Here is a big step forward
15six_382
I’m happy to see the drivetrain back into the car
15six_383
15six_384
15six_385
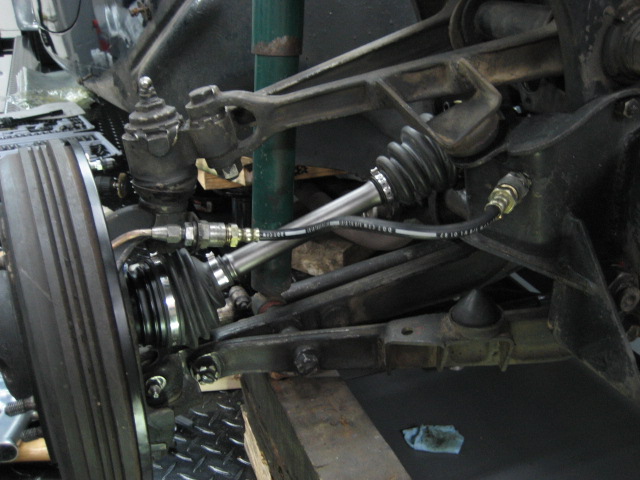
For a few days I had big doubts about the transmission axles, I thought they were too short…
15six_386
… so I did various tests and measurements
15six_387
The original and new axles are very different
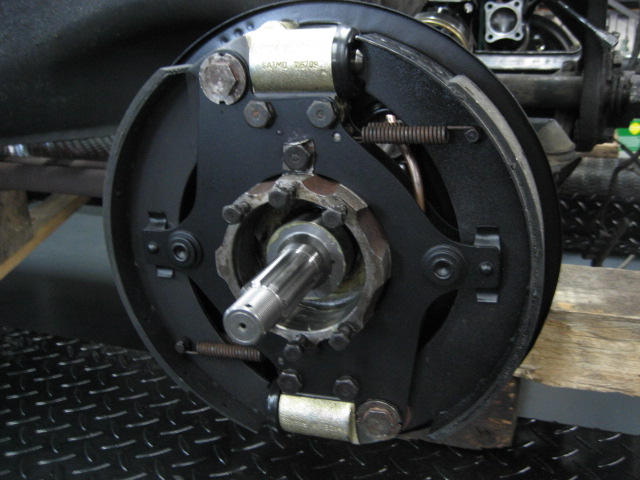
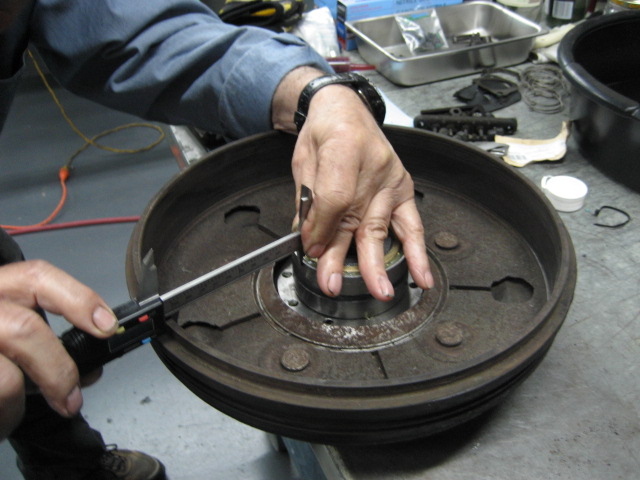
15six_388
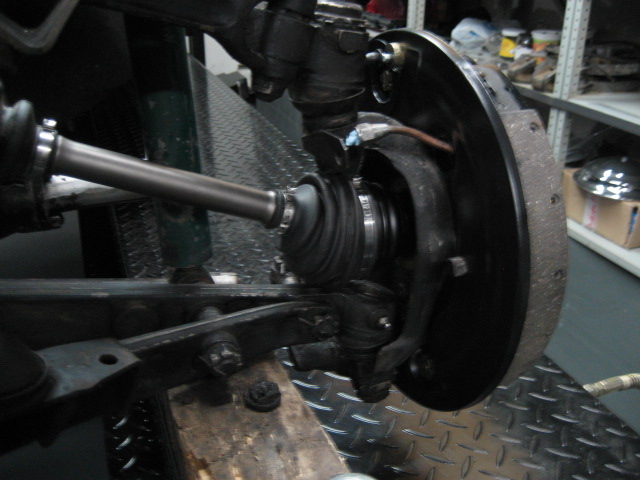
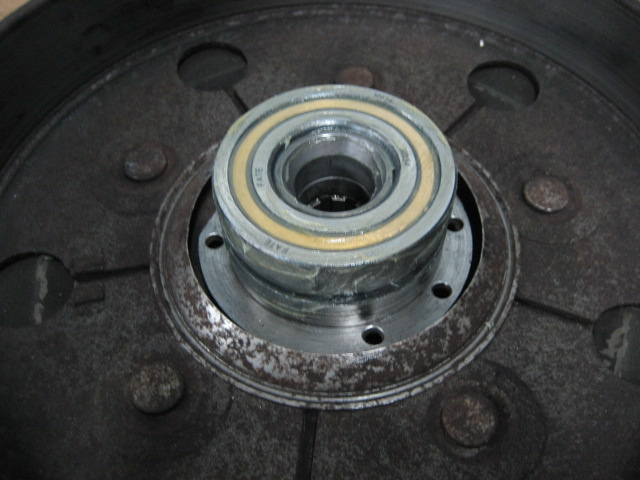
To clarify the situation I tried to reinstall the brake drums, beginning with the installation of the wheel bearings, but I positioned the rings the wrong way…
15six_389
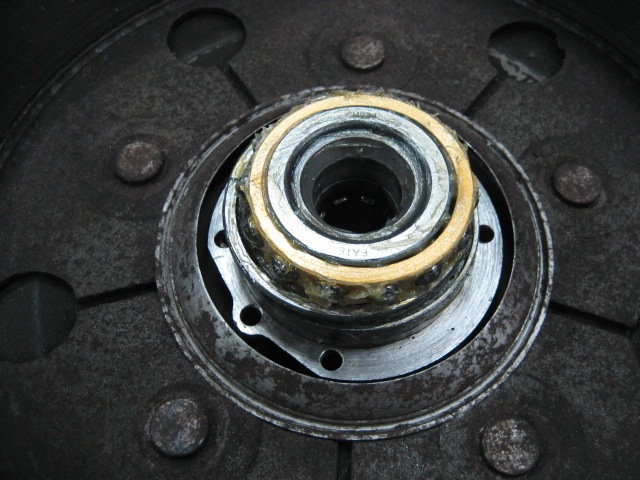
… so I had to remove one of the rings to put it back the other side..
15six_390
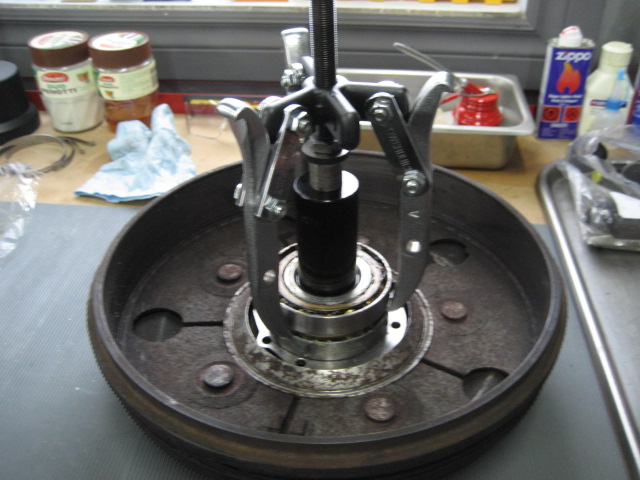
… and extract the bearing…
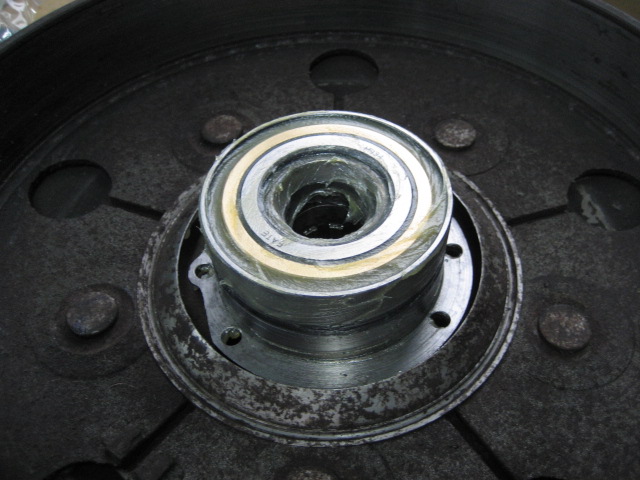
15six_391
… to eventually putting the bearing back the way it should. But anyways I was not able to reinstall the drums 😉
15six_392
Eventually, by measuring the section of the axle that goes inside the pivot, on the new and old axles, I was able to confirm that everything was OK. It has been very worrying 😉
15six_393
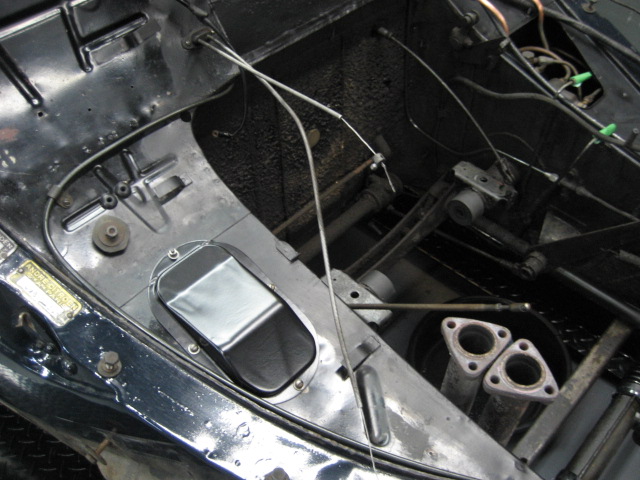
I move forward, with accessories and various connections
15six_394
15six_395
15six_396
15six_397
The fuel pump is back…
15six_398
… as the starter, just cleaned
15six_399
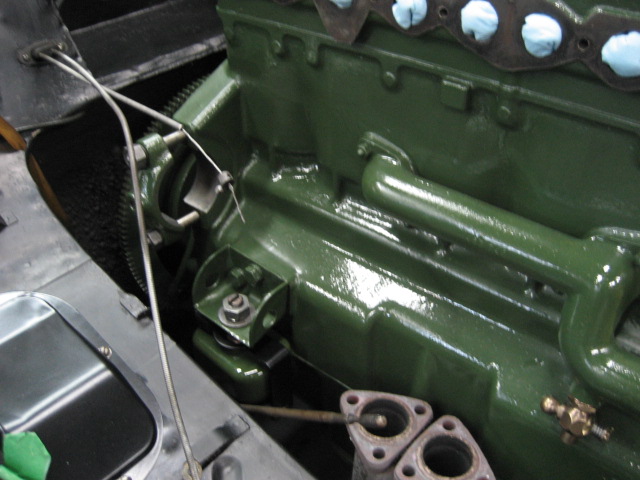
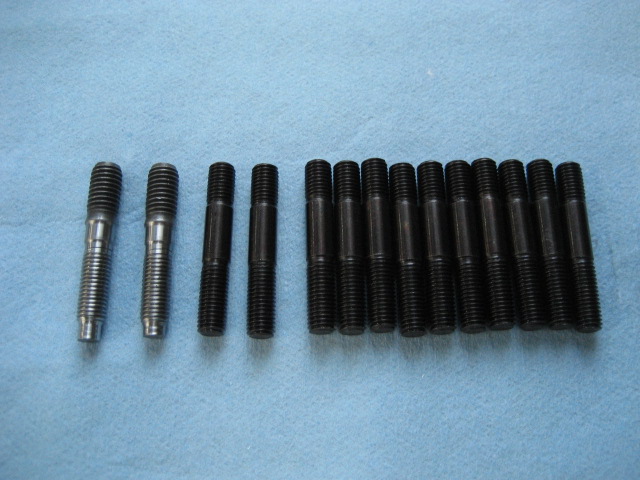
For the exhaust manifold, one of the 7 mm studs had been replaced by a common 8 mm bolt. So I bought new 7 mm studs and some repair studs (7 mm on one side and 8 mm on the other side), here on the left of the picture. I’m very happy of having found that
15six_400
I install all studs but the 8 mm thread seems weak and too short, so I’m going to order and install a “helicoil” repair thread
15six_401
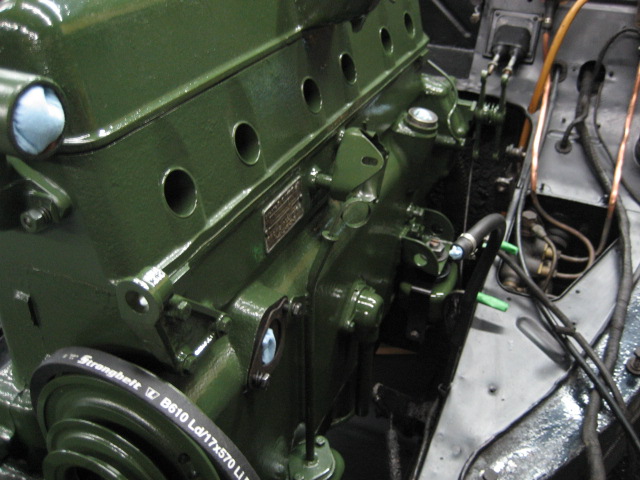
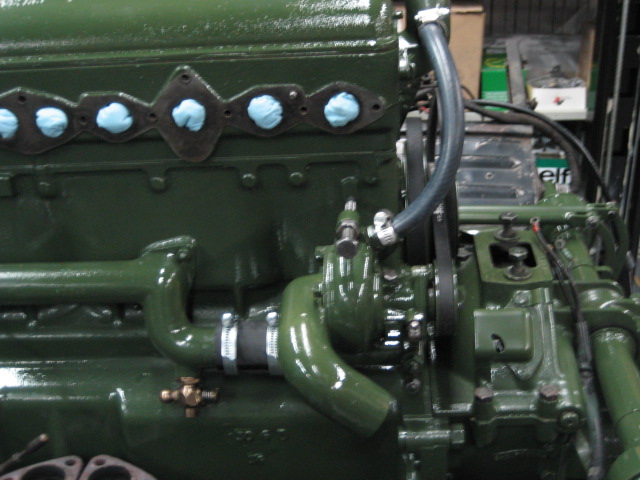
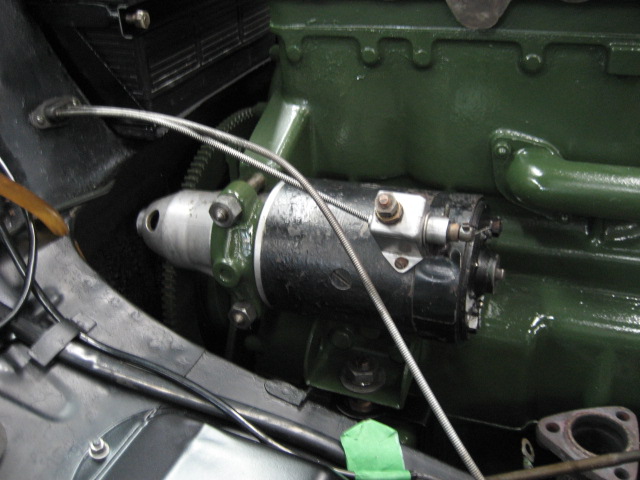
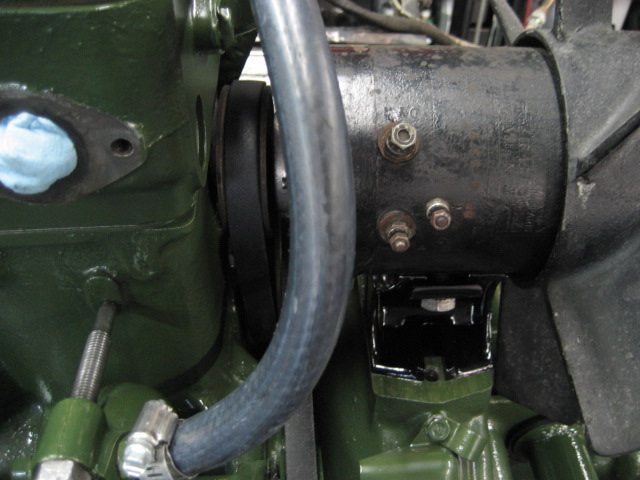
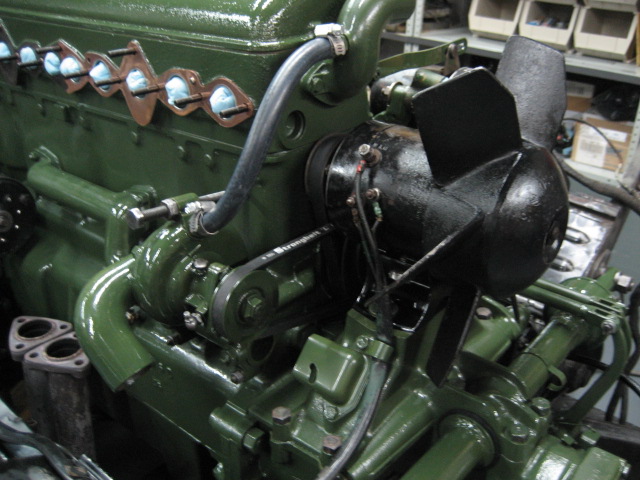
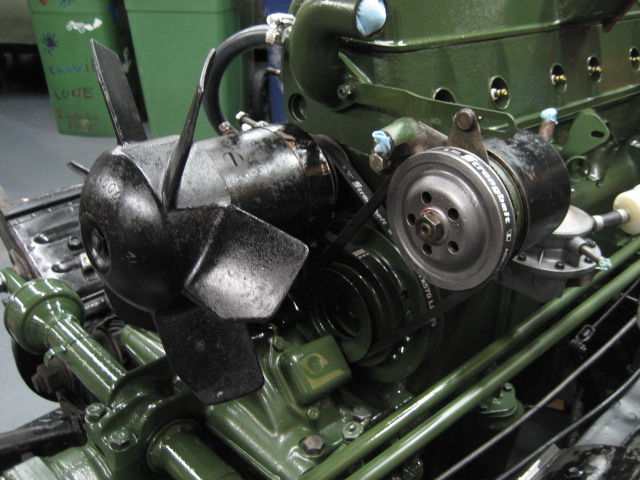
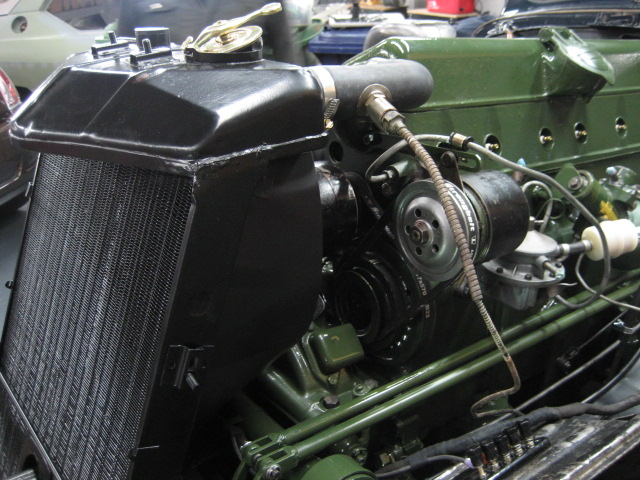
I go on with the dynamo installation
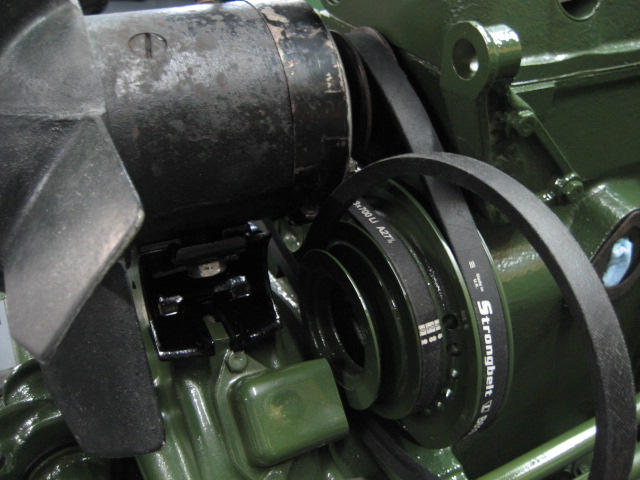
15six_402
I initially thought that the belt was too short because the dynamo is not centered on its mount, but I saw on pictures that it was not centered before anyways
15six_403
But putting it back into place was has not been easy, I had to use straps to position and align the dynamo
15six_404
15six_405
I can then install the hydraulic pump
15six_406

15six_407
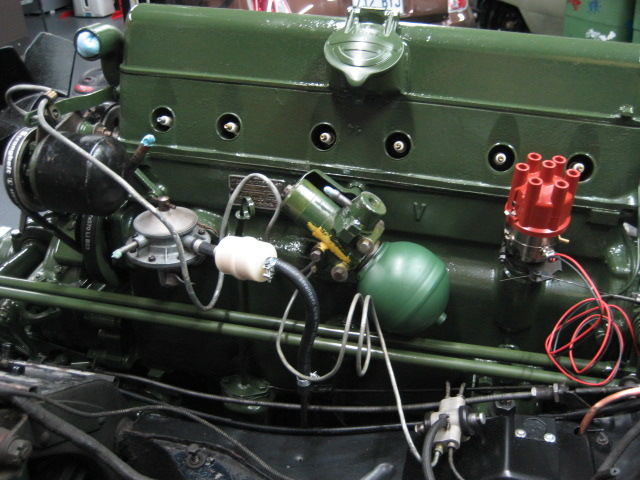
The “123Ignition” electronic distributor then takes place. I’m happy with those I installed on the SM and the Jag so I do the same for this Traction
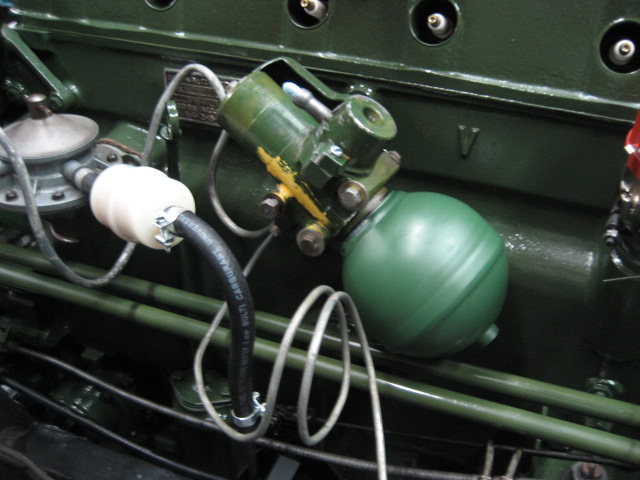
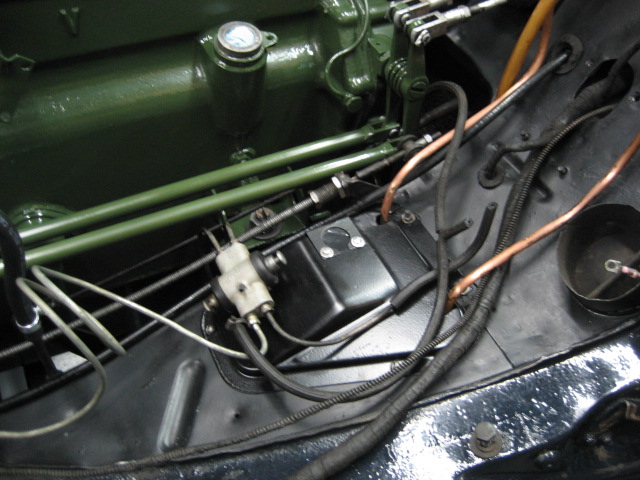
15six_408
I then put back the hydraulic pressure regulator, overhauled, with a new accumulator sphere
15six_409
15six_410
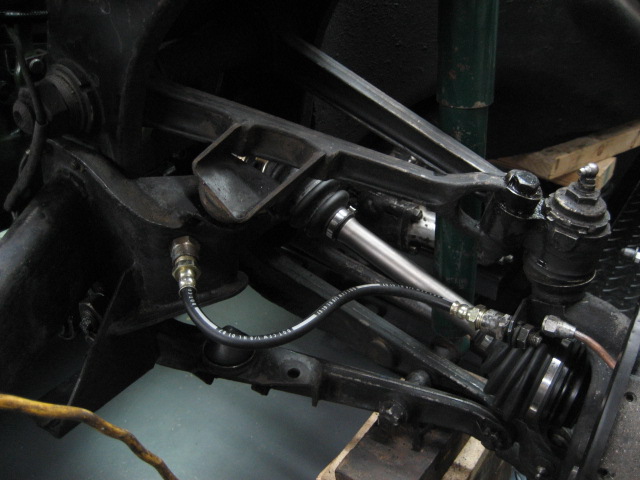
I then call Claude and Dominique to help me. In three days we’ll make huge progress. We start by reinstalling the flexible brake lines
15six_411
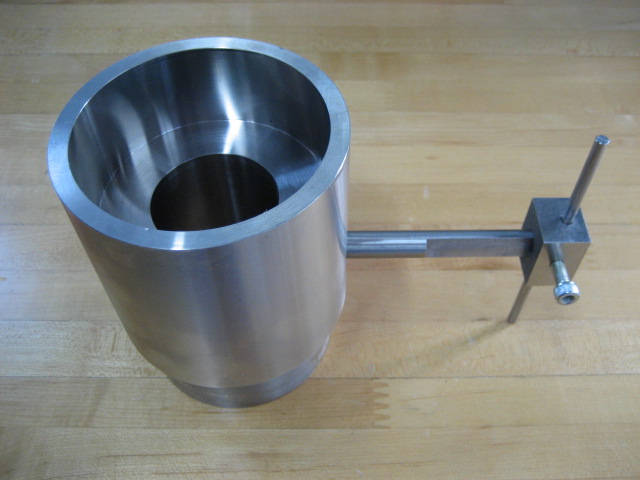
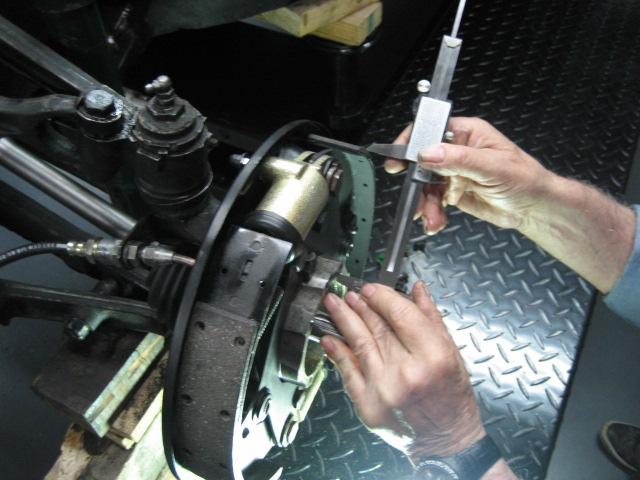
I had made a replica of the special tool dedicated to the adjustment of the front brake shoes… but we discover that we won’t be able to use it because it doesn’t fit correctly onto the pivot and around the wheel bearing. I’m very disappointed
15six_412
So Claude laughs at me and adjust the way he always does, with a caliper 😉
15six_413

15six_414
Then it’s time tu put the drums back, it wasn’t easy but Claude and Dominique did it
15six_415
Silicone brake fluid (DOT5) was used but here in North America this kind of fluid is colored purple, so we won’t just mix, we’ll replace the whole fluid
15six_416
The bleeding operations is then a success, so the new brake line and all connections seem OK

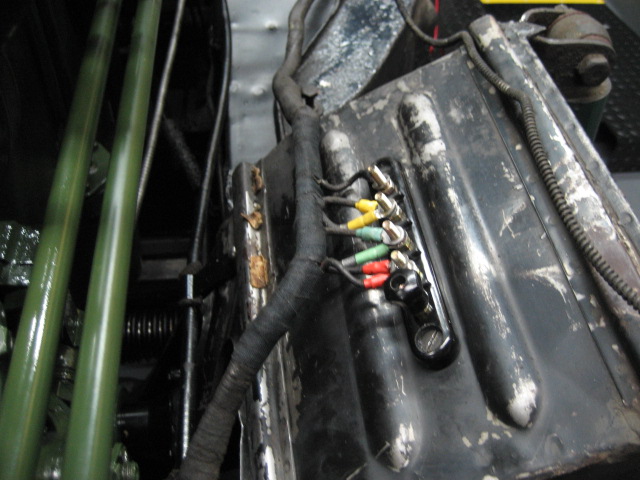
15six_417
Two repairs, horrible and with no insulation, were done on the wiring harness, Claude works on doing a clean repair
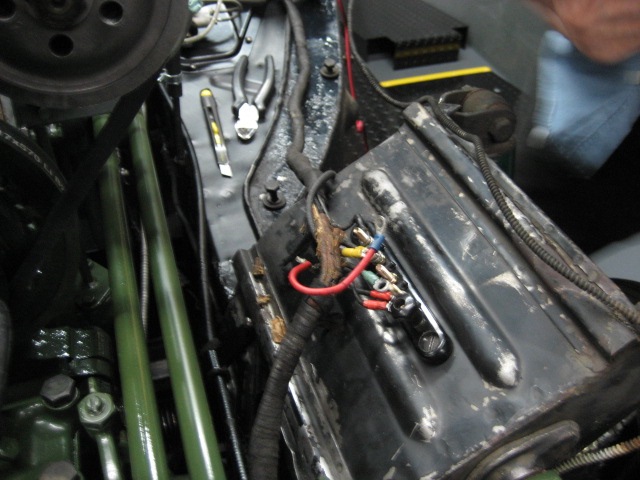
15six_418
15six_419
Here is the result, it’s clean and significantly safer
15six_420
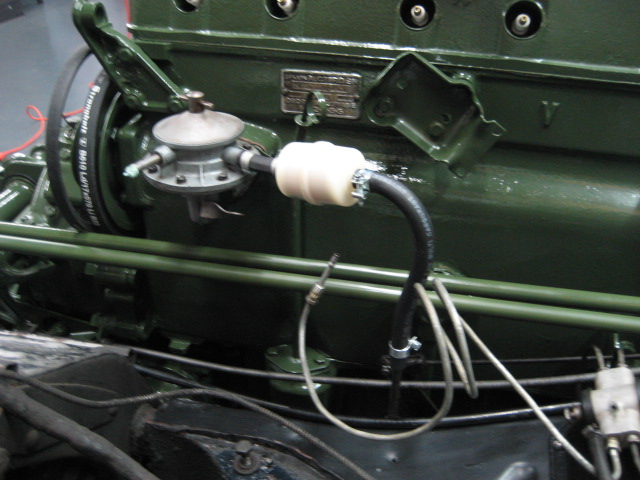
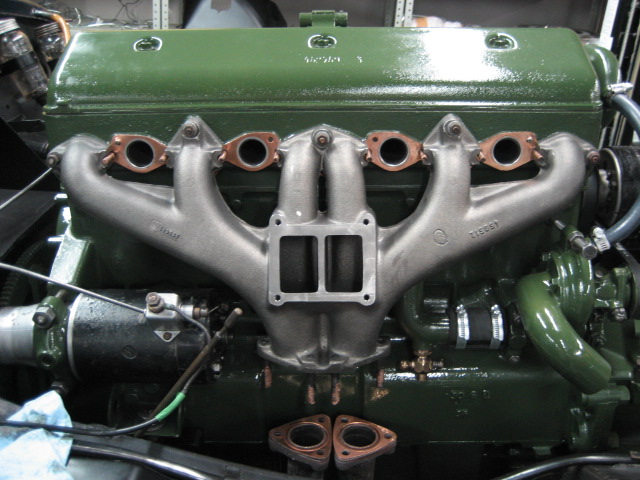
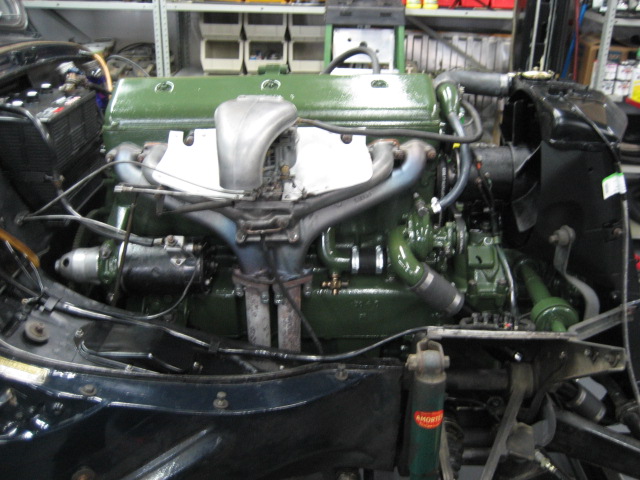
The exhaust manifold is back, after having installed, as planned, a “helicoil” repair thread to secure the repair stud located at the very left
15six_421
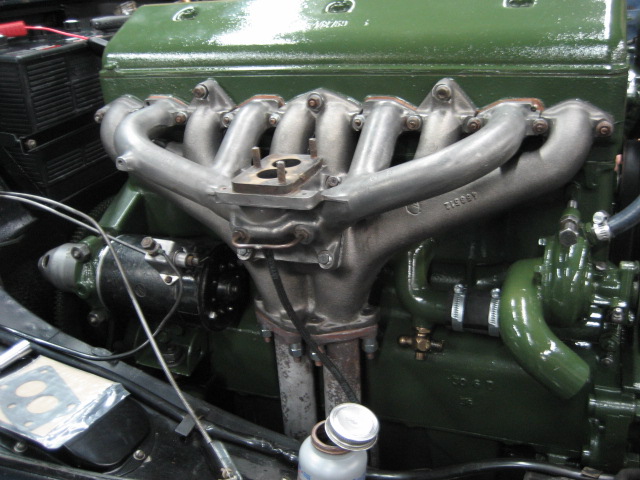
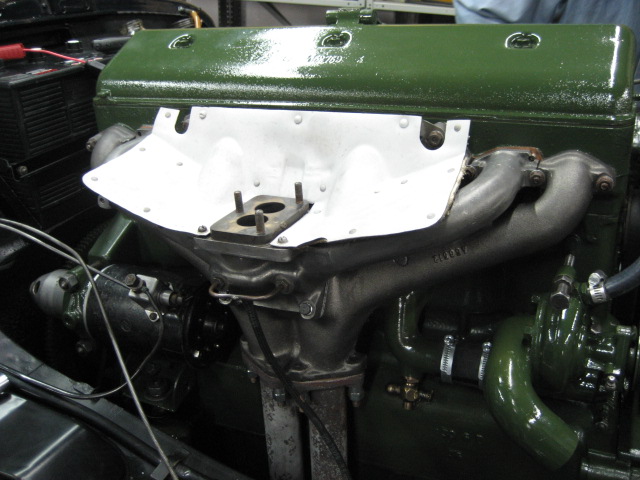
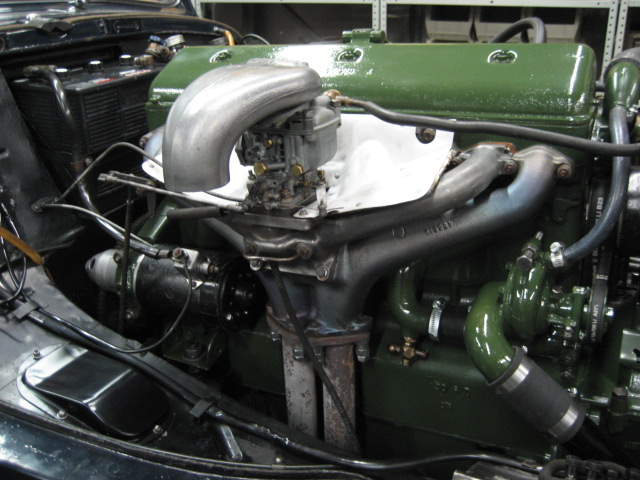
Then the inlet manifold is back, after cleaning and brushing. It all begins to take shape
15six_422
I did a very light sandblasting on the protection screen to clean it
15six_423
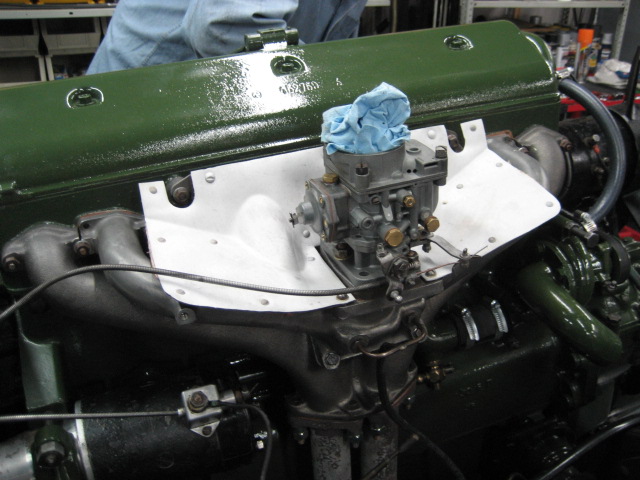
The carburetor is back, startup is close
15six_424
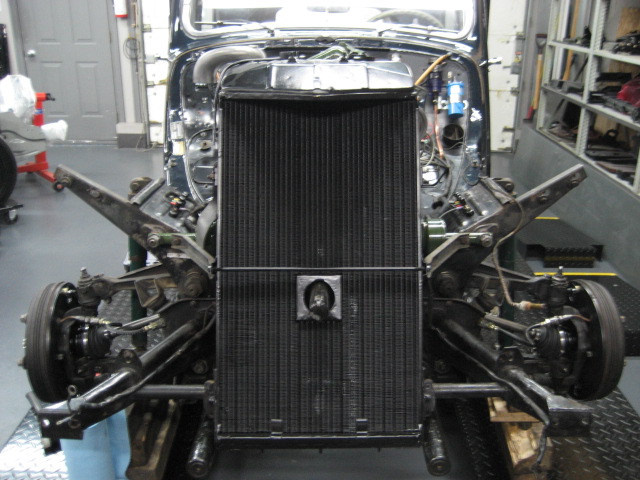
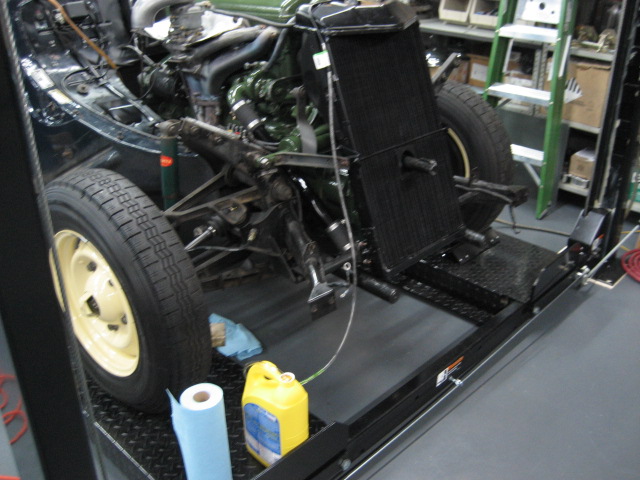
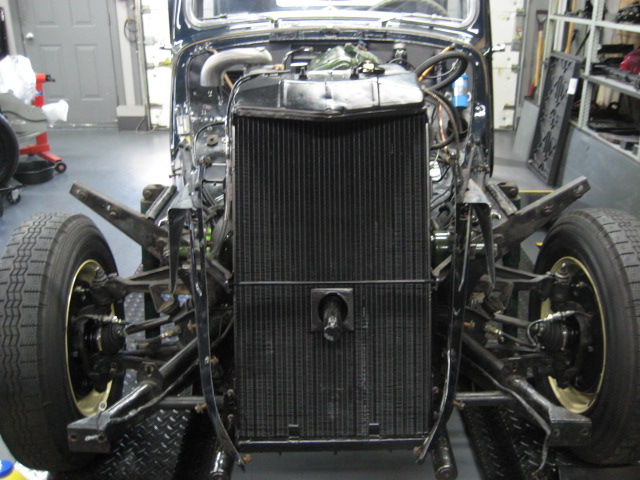
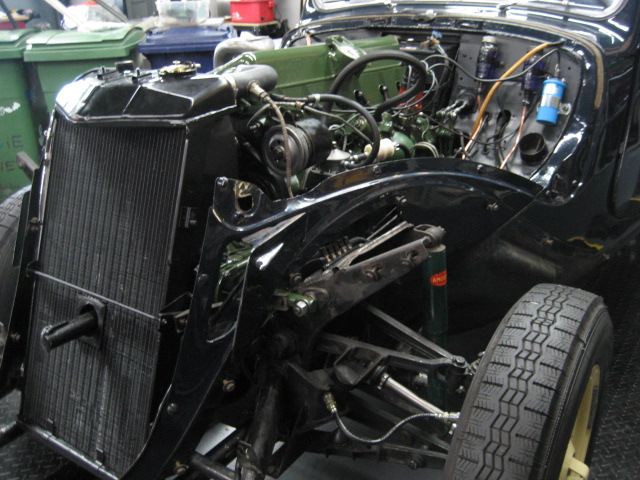
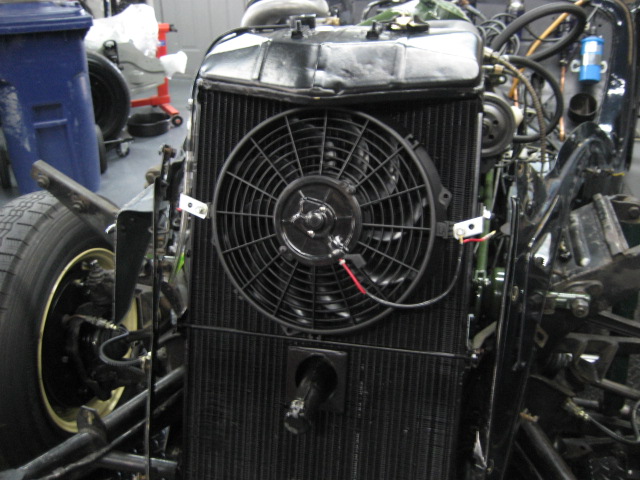
Then it’s radiator’s turn
15six_425
15six_426
The exact position of the radiator will be set later, with the front grill, side panels and hood
15six_427
The top coolant hose must be drilled to reinstall the temperature sensor

15six_428
Between the radiator and water pump a simple straight hose was installed, I fitted a steel tube, as it was originally

15six_429
Here it is, we are ready to star the engine. As the hydraulic circuit is not ready (at this point I did not paint the tank yet), I remove the belt driving the hydraulic pump
15six_430
It doesn’t start immediately because I made a beginner mistake while setting the engine on the timing point, I was one turn off, but once this issue fixed, the engine starts and the exhaust manifold begins to change color
15six_431
Because I plan to install a coolant expansion tank, I removed the radiator pressure valve, so we had to install something temporary to take what’s coming out from the radiator
15six_432
15six_433
Then we put back the side panels
15six_434
15six_435
15six_436
Before putting back the front grill, we install an electrical fan, it will allow to face big traffic jams, they are quite common in the Montreal area
15six_437
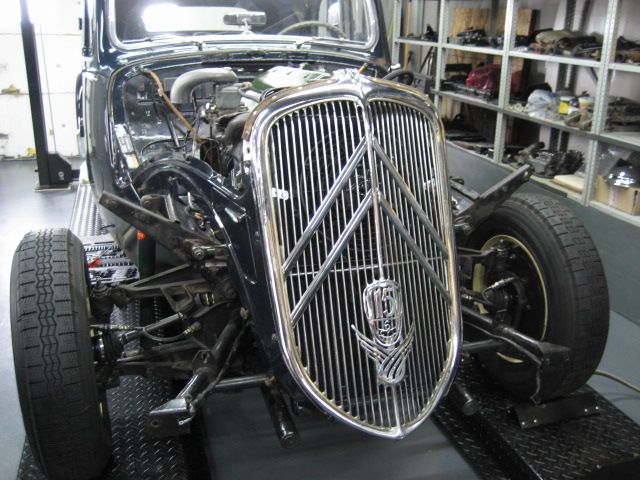
The front grill is then reinstalled
15six_438
15six_439
I love the way a Traction looks without its fenders
15six_440
15six_441
Fenders are now back, with the front bumper…
15six_442
… this is not easy to align all these body panels, with also the radiator. By the way, this is not perfect

15six_443
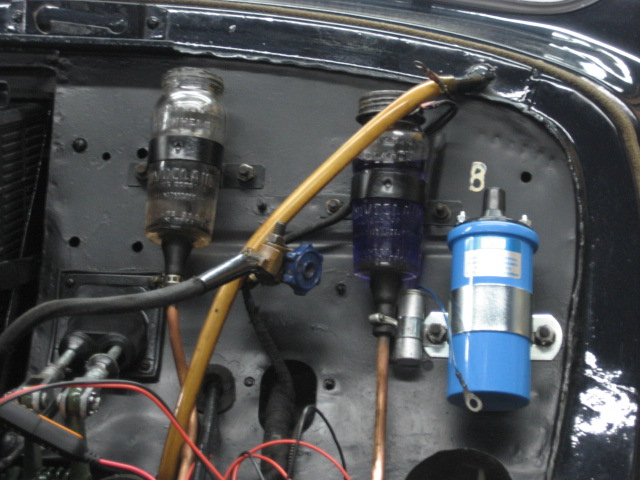
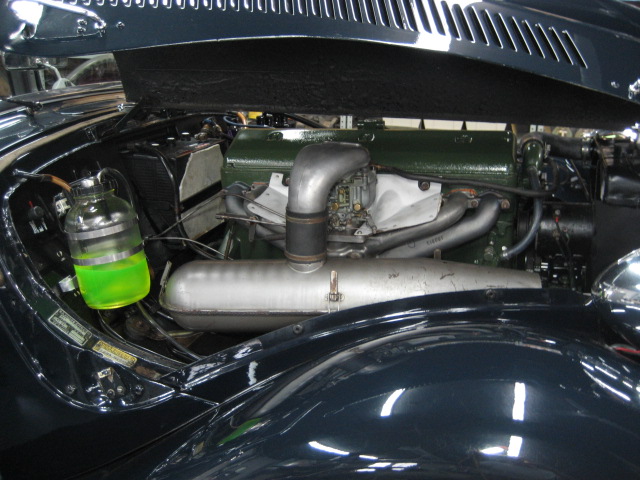
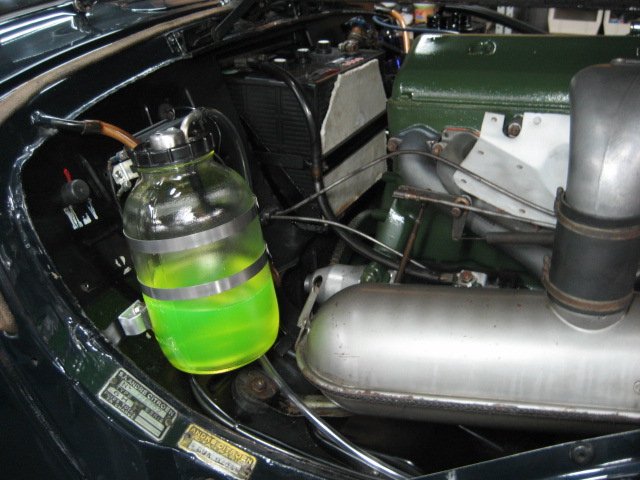
As we did for the front brake circuit (right bottle here), we replace the fluid for the rear circuit (left bottle). This car has been equipped with a double brake master cylinder
15six_444
The additional headlights were simply not connected so Claude connects them, by installing a protected (fused) relay located underneath the voltage regulator using an existing hole on the fire wall
15six_445
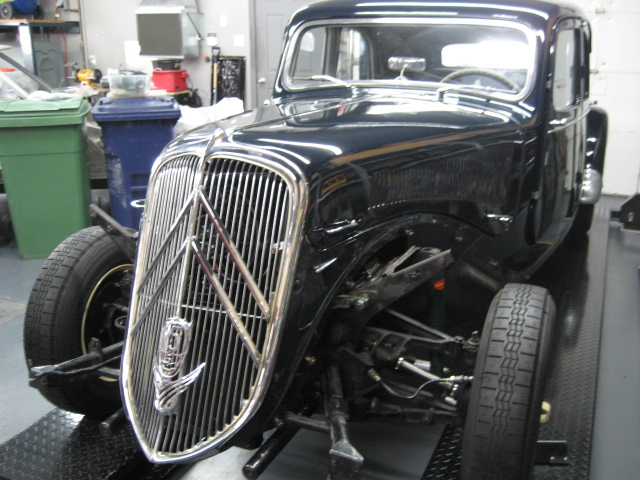
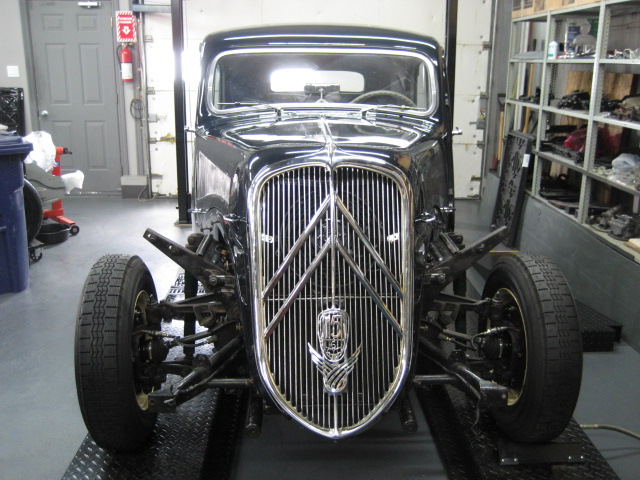
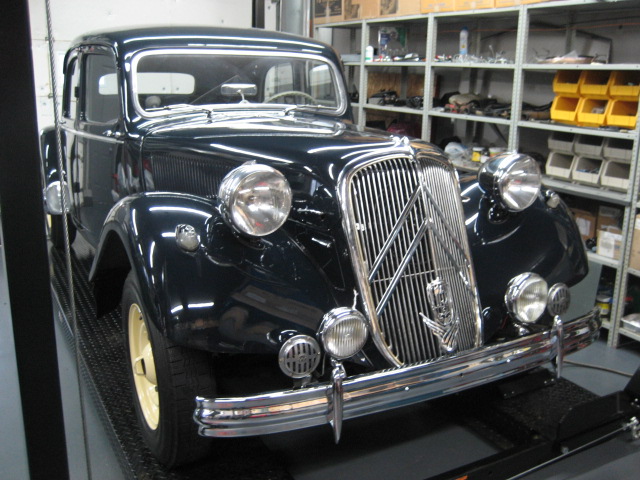
Here is the beauty with all her clothes. Thanks to Claude and Dominique, their experience brought great progress
15six_446
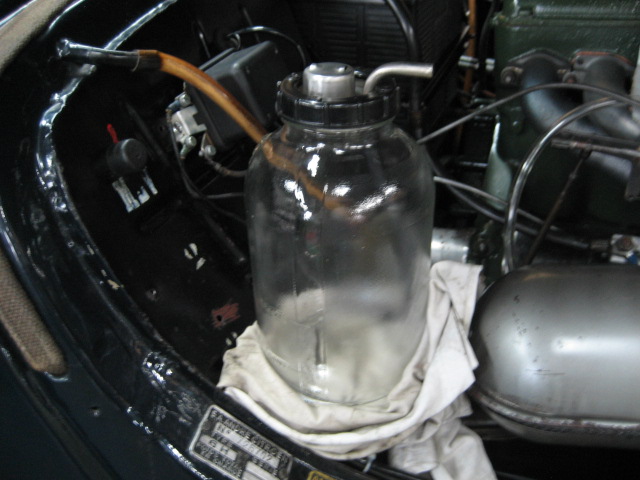
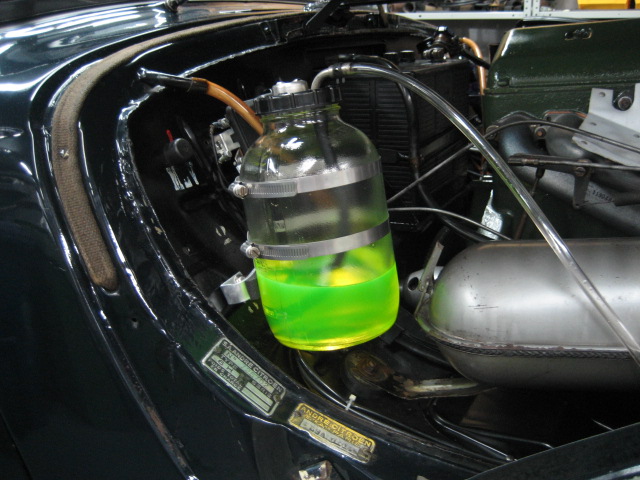
I go on alone, with the installation of the coolant expansion tank. Made of glass, it’s the kind of expansion tank fitted on various Renault cars during the fifties and sixties, for instance Renault 8 and Caravelle
15six_447
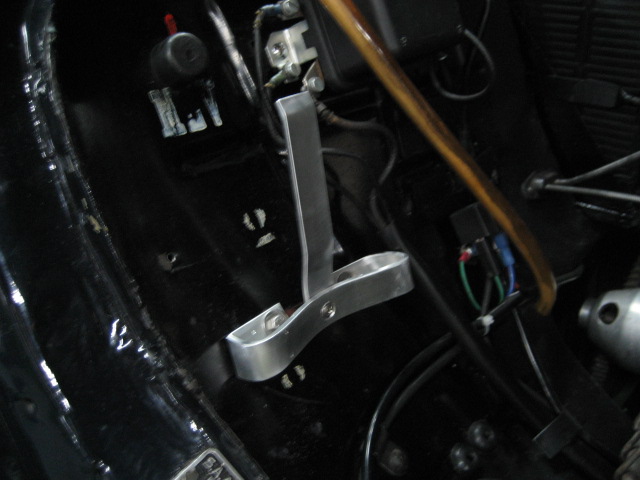
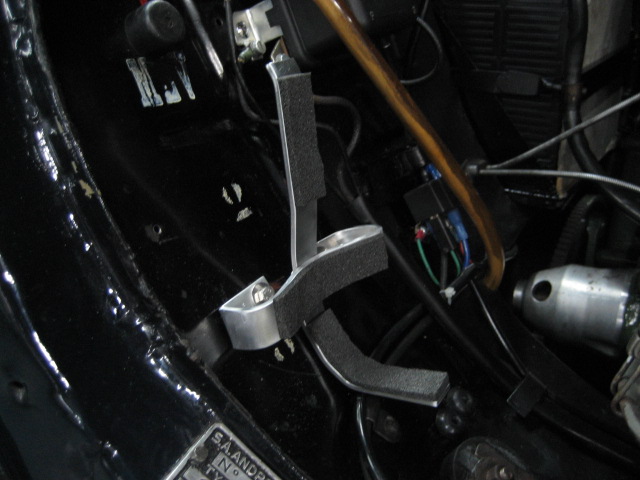
I make a bracket that uses two existing holes in the fire wall. The result looks strange, let’s say it’s art 😉
15six_448

15six_449
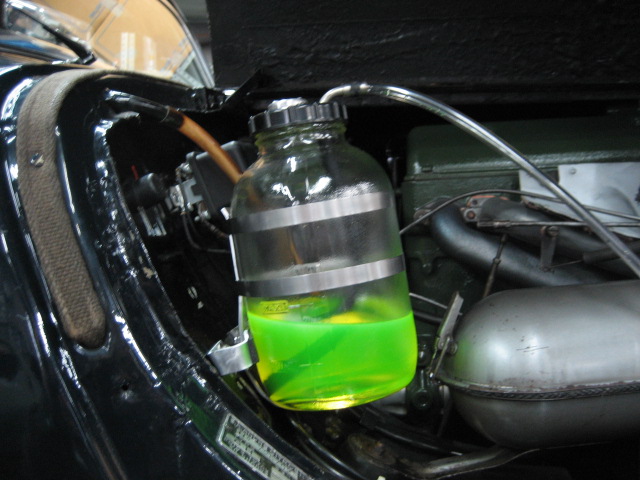
Here is the tank installed…
15six_450
… and ready to work…
15six_451
… but I start by rotating the clamps to get a cleaner look…
15six_452
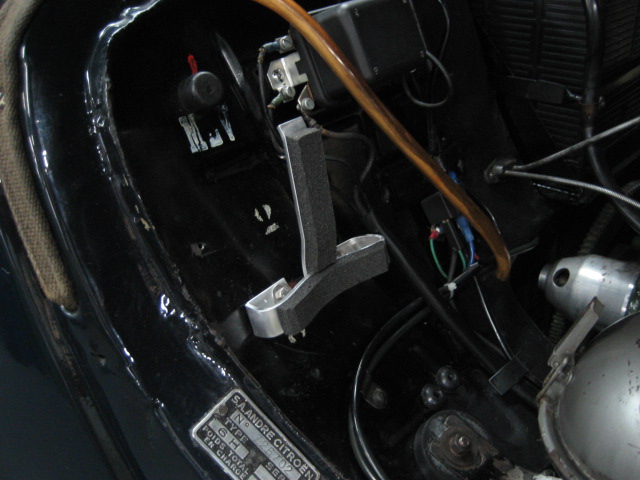
… and then I modify the bracket to better hold the tank vertically
15six_453
And voilà ! I still have to fit a longer hose to hide it a little bit more. I may have to replace the hose because I’m not sure it will take the temperature correctly
15six_454
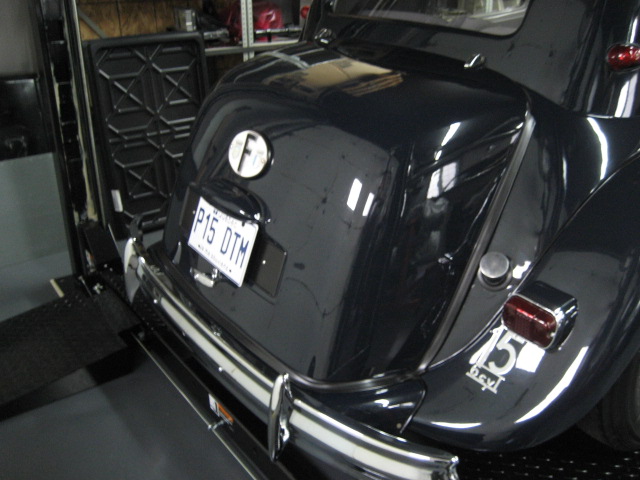
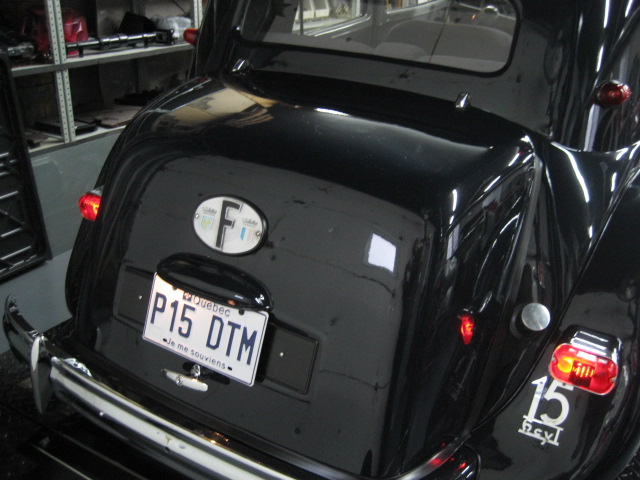
Before driving the car I sure have to install the licence plate. I used a french licence plate as a base, to avoid making additional holes in the trunk lid
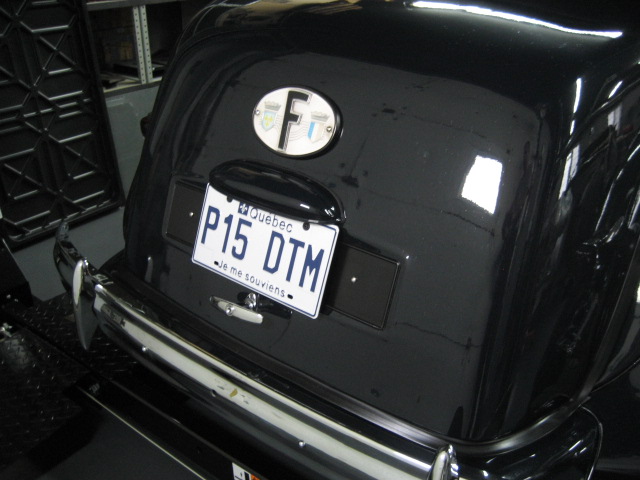
15six_455
I was able to chose the number “15” in the licence number, that’s cool because it all depends on the goodwill of the person we meet at the licence office
15six_456
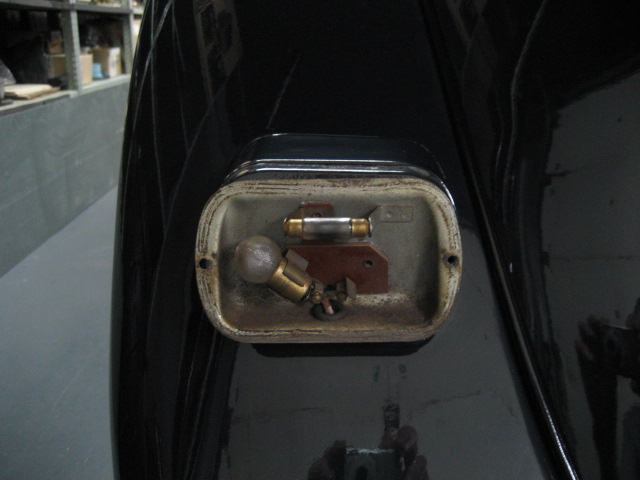
Tail lights were working differently from one side to the other one…
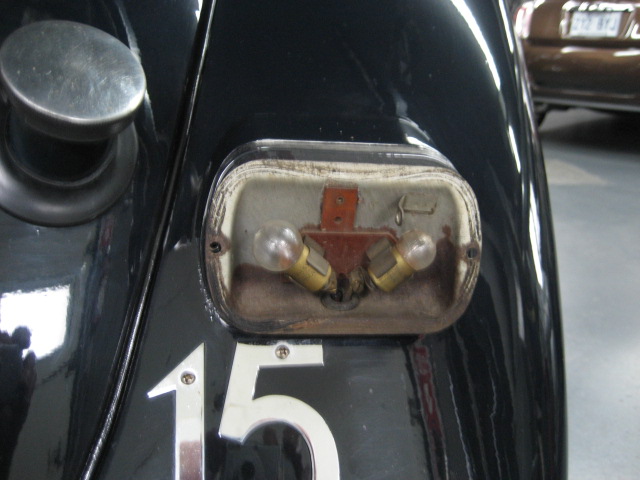
15six_457
… it’s not surprising, they are not configured the same way…

15six_458
… but anyways I’m going to install LED plates…
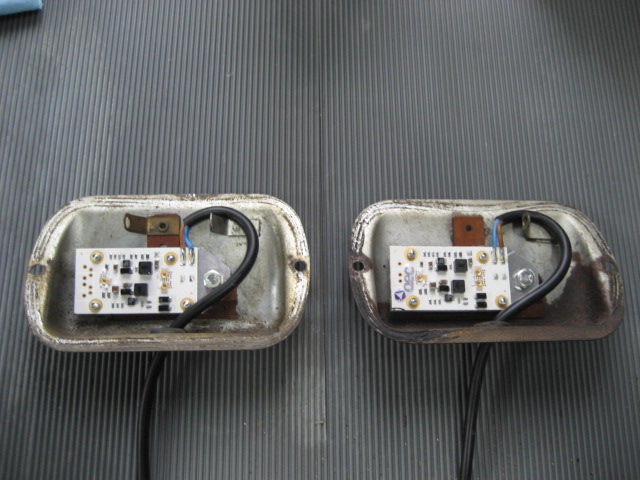
15six_459
… here are they, fitted into place
15six_460
Here is the result, it seems visible and it will be a safety plus
15six_461
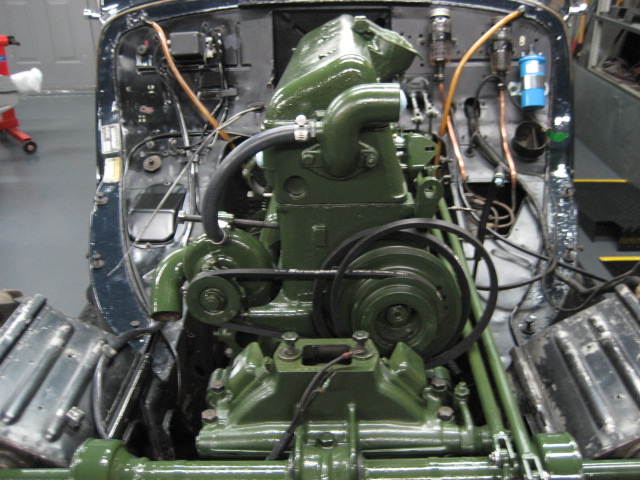
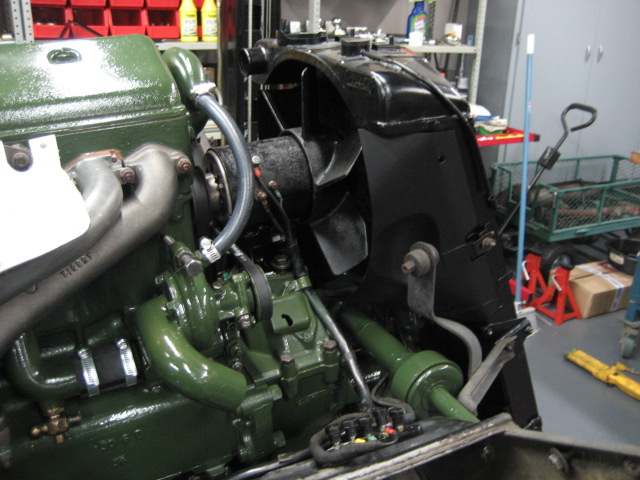
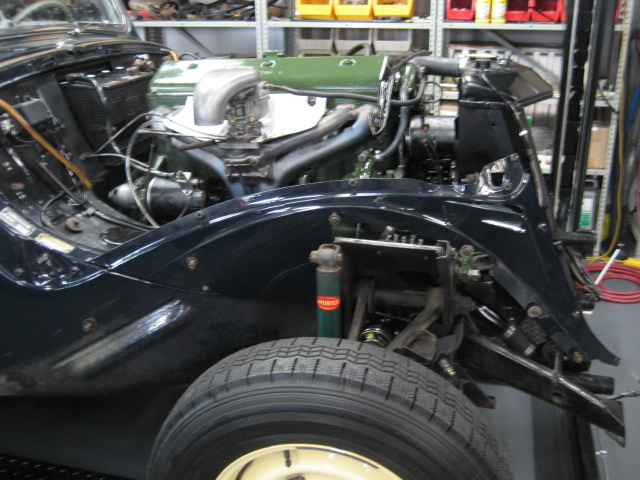
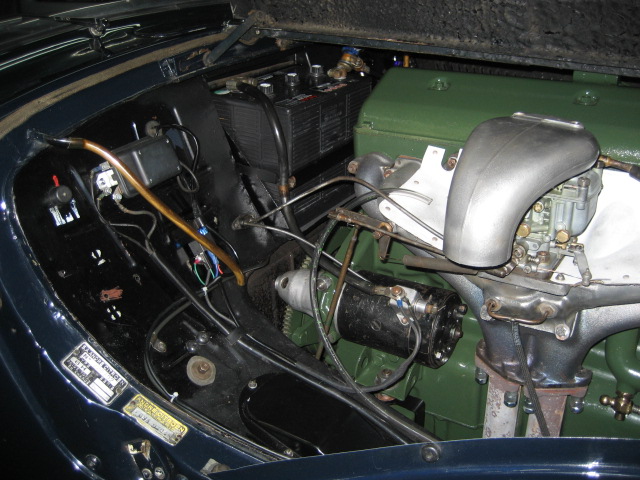
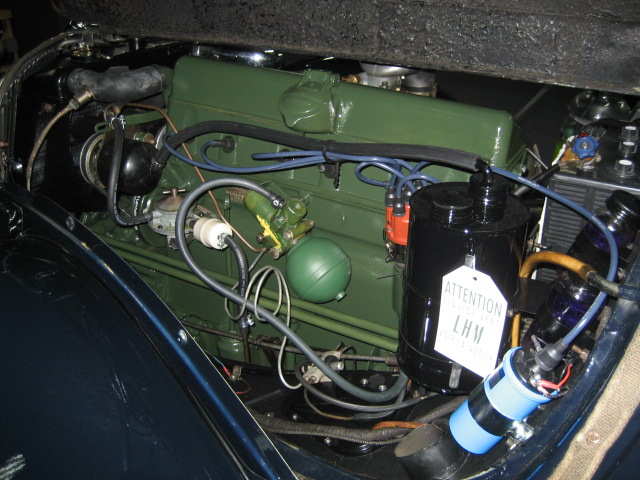
Here is the engine bay once the hydraulic work done
15six_462
The quality of the new ignition wirings seems poor so I replaced it with a better one, with silicone wires
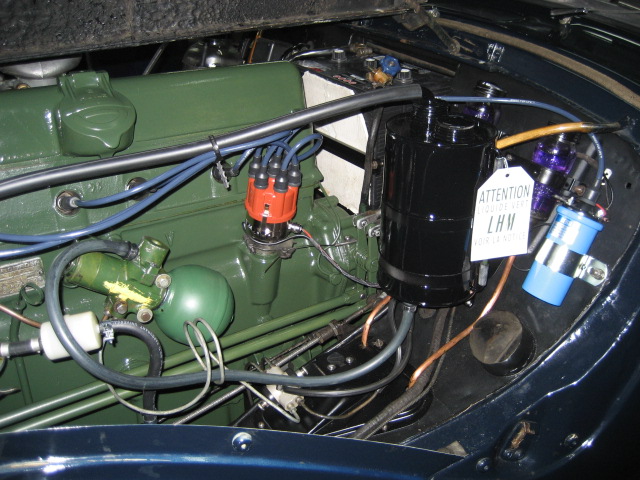
15six_463
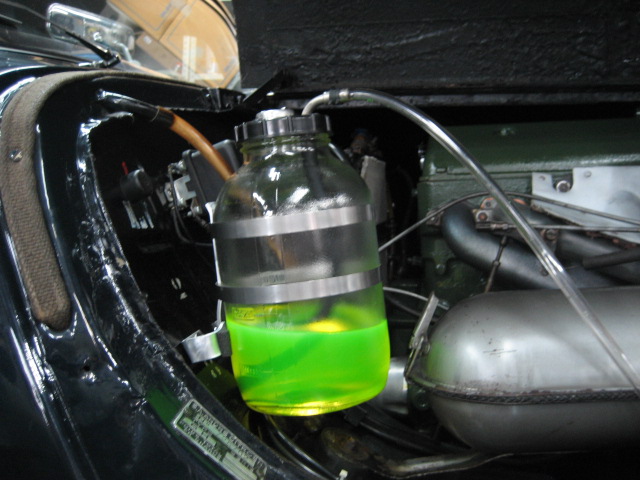
On this side, I replaced the expansion tank hose by a longer one, it shows a little bit less that way
15six_464
I also had an issue with the clutch, I modified the adjustment of the clutch control arm, the first and reverse gears are now easier to select, but this is also not perfect.
But brakes are working very well, the hydraulic system works like a charm, the expansion tank is working well too (the radiator seems to breath well).
This is very difficult to evaluate but I think this intervention represented about 300 hours of work. I spent the most part of my free time since last November. I think the result is good but we’ll see in the future if reliability is there.